Powered by Blogger.
Showing posts with label MAC. Show all posts

Every Day Eyeshadow (tutorial)

Penulis : Unknown on Thursday, 23 August 2012 | 05:52

Thursday, 23 August 2012


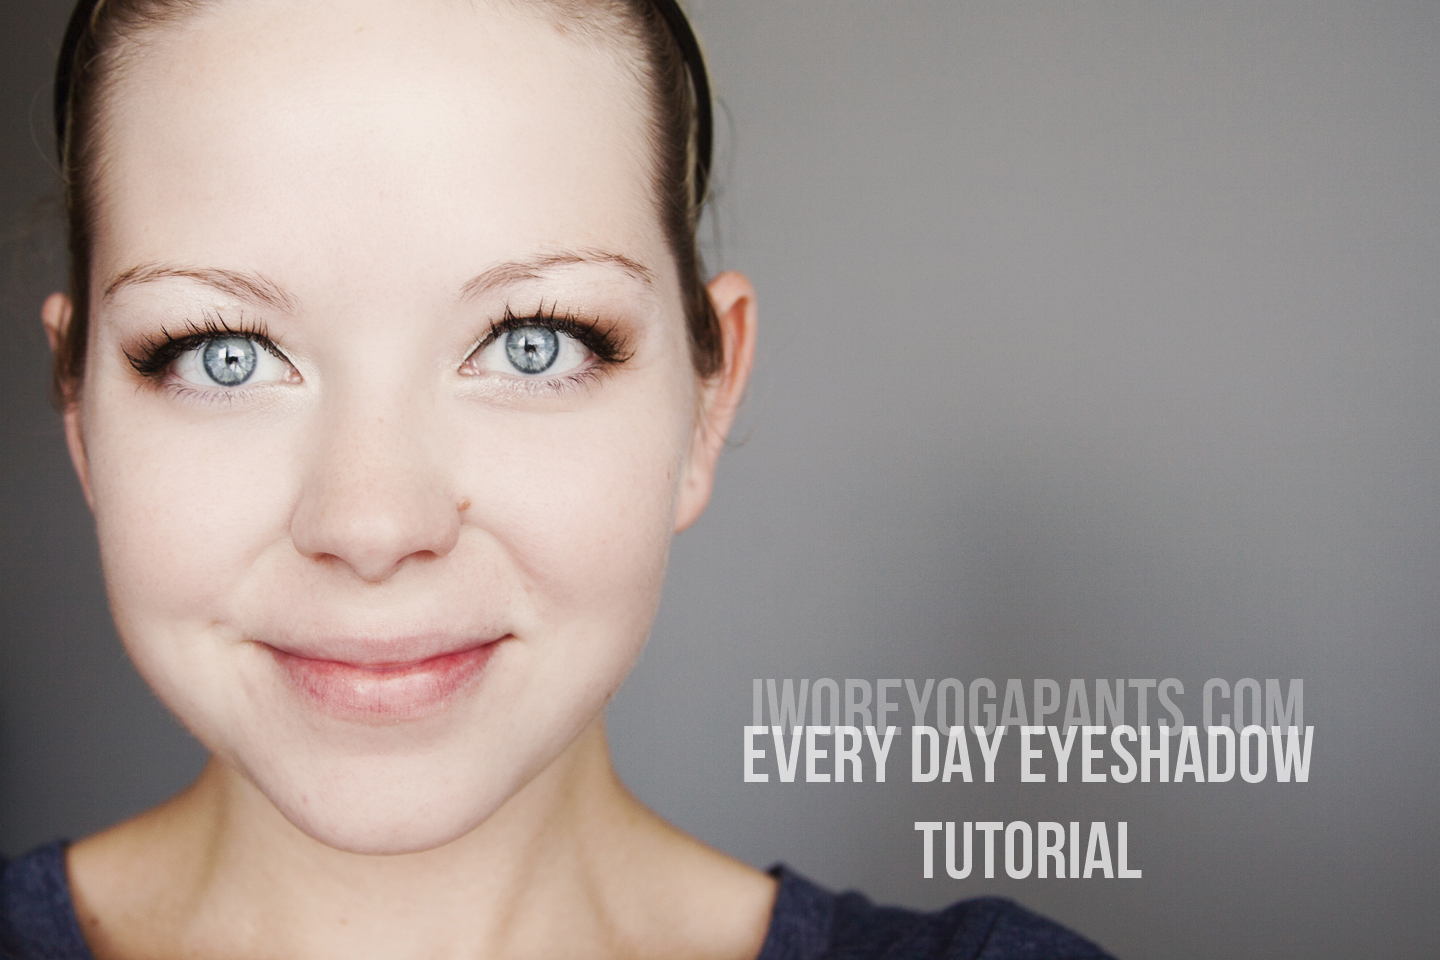
One of my favorite bloggy homegurlz, Kate, requested an eyeshadow tutorial from me and when a homegirl asks for something your girl delivers! Today, I'm going to show you all my every day eyeshadow how-to. Not to say I wear eyeshadow (or any other makeup) every day, or even every other day, but when I am going au natural with makeup - this is what I do.


Prime your eyelids with whatever primer you prefer. I use foundation, most of the time, for my natural shadow.


Shadow: MAC - Nylon

Take a beige/nude shadow, I use MAC's Nylon, and highlight your brow bone, insides of your eye lid and under the corner of your eye.

Brush: For this I use my finger. 
I only recommend this when you're doing your own makeup... don't go sticking your dirty fingers on your friend's bare skin.


Shadow: Urban Decay (Naked 2) - Half Baked

Brush: Finger

Using a bronze shadow and my finger, I cover my eyelid and move slowly up towards the brow bone - under the highlighted shadow I previously applied.


Shadow: Urban Decay (Naked 2) - Snakebite

Brush: MAC 217

Blend a dark brown shadow from the outer corner of your eyelid into the crease of the eyelid - slowly moving up to contour the crease. Nothing too drastic, this is supposed to be a natural look.

I like to go a little darker on the outer corner for shape.


As for the shadow, that's it. 


Now I line the top of my eyelids with L'Oreal's liquid liner... I slightly wing the outsides, but that's personal preference.


The finishing touch on this look is MAC's False Lashes Extreme.


And viola! This is a very simple look that really isn't very time consuming. Why don't I always wear it? Well... I'm lazy. ha. In a perfect world, I'd do this look every day.

Like this tutorial?

Depending on how this post goes, and if it's actually helpful (I have no idea if I'm good at explaining this stuff, so let me know!) I will do a similar tutorial on a more "going out" look with darker shadows and under-eye liner.

Here is the post where I talk about the different makeup I use, if you missed it.

Happy almost Friday, loves!
comments | | Read More...

What's On My Face.

Penulis : Unknown on Tuesday, 14 August 2012 | 07:44

Tuesday, 14 August 2012


Good morning, loves, and happy Tuesday. I have the day off today so I'm spending a little extra time on today's post and I'm sharing a little secret with you all...

So, guess what?

I don't actually wake up looking like this. Shocking, I know. Of course my boo wakes up looking sexy... damn you, men.

I can't believe I'm actually posting this, but this is actually what I do look like when I wake up...
Disclaimer: I am not responsible for nightmares this photo may cause.

Yeah, that's some scary shiz. I know. Those aren't even Louis Vuitton bags under my eyes, guys. Uneven skin, red nose... Surely I'm the cause of any and all nightmares C has. 

So, how do I get from Scary Spice to Baby Spice (yes, dammit, I'm still living that performance)... today I will show you!

First, here is a look at the products I use on the regular, in order from start to finish. 

As far as primers go I'm not too picky, though I am a big fan of the pore minimizers. I got Benefit's Porefessional in a Birchbox so I've been using that sample up lately, but my original choice has always been Too Faced Primed and Poreless.

Once I'm primed I cover my face, blending at my neck, with Revlon's PhotoReady foundation. I really love this stuff which is shocking because I am, sort of, a makeup snob. I apply this foundation with my hands.

Next I take a makeup sponge and apply by dabbing MAC's Pro Longwear Concealer under my eyes and on my nose. 

Before I started realizing my skin was aging I never, ever wore foundation. Only MAC StudioFix. Ha, if only we could all be so lucky now, huh? Nowadays I dust StudioFix over my forehead, nose, and chin (T-zone) just to eliminate shine throughout the day.


I learned of Benefit's highlighter, High Beam, from PinkLouLou a little over a year ago and it pretty much changed my entire makeup regiment. This stuff is face glow in a bottle! I apply it to my cheek bones and right under my eyebrows.

I'm a huge fan of MAC's Mineralize bronzers and blushes. My cheek bones get brushed with pink or very light bronze and I accent them with a darker bronze.

I start with MAC's Nylon eyeshadow every single time I do my eye makeup. I've loved this color for as long as I can remember and it is the perfect shadow to highlight the inside corners of the eye. Also great for the brow bone, under your eyebrows.

For everyday shadow, I use half baked and snake bite from Urban Decay's Naked 2 palette. I plan to make another post, one of these days, on my eyeshadow application, stay tuned!

This is liquid eyeliner by L'Oreal and another drugstore product I swear by. I've been using this eyeliner since I was a competitive dancer. It makes perfect lines without bumps or flaws!

 And lastly, as I posted a little while ago... MAC's False Lash is the only mascara for me! 

comments | | Read More...

MAC False Lash Extreme

Penulis : Unknown on Thursday, 19 July 2012 | 12:34

Thursday, 19 July 2012


Lash lovers, may I introduce my new obsession. False Lash Extreme by MAC.


In this tube you will find the best $20 you may ever spend. Yes, it does sound steep, but I assure you that it is, indeed, falsies in a bottle. 


One coat of this mascara and I was hooked. So much so that if MAC ever decides to take this baby off of the market I will stock up. This, in addition to my daily use of Latisse, and I feel like I have natural eyelashes as fabulous as any celebrity who wears falsies!! Really though, I can't even fathom how it is so amazing. I'm the girl who has tried out every new mascara that comes to market but I've NEVER found one this amazing!


and if you compare my Latisse Journey photos to this, you can see that they look TONS longer!

Seriously though, go pick some of this up. It is worthy every penny! 


comments | | Read More...
 
Design Template by blogger | Support by creating website | Powered by Amadoras